Showing posts with label paint projects. Show all posts

Friday, April 04, 2014

How To Paint a Crisp Line on Textured Walls

Hello everyone! Today's post is a little different -- less of a project and more about sharing a triumph. :)

When we moved to Colorado, we encountered something different in the houses here than we had ever experienced back in the Midwest -- textured walls. Oh, I know we have textured walls back home, but not on the scale that we encountered as we were looking for houses out here. EVERY house had textured walls.

I have nothing against textured walls at all -- they look lovely, to be honest. But my first immediate thought was that it would be impossible to paint them. And I was right. In our house now, there are lots of walls with lots of paint seepage from the previous owners who had tried to tape the wall off but didn't quite succeed. Like this...

Paint seepage -- ACK!


Paint seepage -- ACK!

Ack! I hate how that looks. It drives me NUTS to see this. Like lay-in-my-bed-at-night-and-seethe-about-the-paint-seepage. I knew there had to be a way to paint these textured walls without paint seepage.

Thank goodness for Pinterest, collector of all things we ever need to know. I finally found this tutorial about painting crisp lines and I got up the courage to try it out. I figured I couldn't make it worse, right?

The technique is kind of labor-intensive, but so worth it if you obsess about crisp lines and paint seepage like I do. Here's what you do:
  1. Paint over the bad paint line with your base color (the color that's staying on the wall). This just covers up the paint seepage, giving you a clean slate to start with.
  2. Use green FrogTape. Period. It's the only paint tape that's worked for me on these textured walls. Tape down on the wall you want to leave as the color it already is (the same as the base color you painted in step 1).
  3. Paint over the tape edge with your base color, sealing the tape. Now, any paint that will seep under the tape will the same color as the color that's staying there anyway.
  4. Paint with your new paint color, however many coats you need.
  5. Peel off the tape VERY CAREFULLY, pulling it at an angle to the wall. Be gentle here.
  6. Voila. Stand back and admire your beautiful crisp paint lines.
How to get perfect paint lines -- www.MightyCrafty.me

No paint seepage! Feel completely satisfied with your work. :)

How to get perfect paint lines -- www.MightyCrafty.me

How to get perfect paint lines -- www.MightyCrafty.me

So all over my house, we have these little inset walls, where you would hang a picture or something. I have been working my way around the house, painting them in a dark grey color from the red that was there before.

Before...

Old red painted walls


And after...

How to get perfect paint lines -- www.MightyCrafty.me

So much better! (And you might recognize my Menu Board and Weekly Organizer too!)

I'm using Behr flat paint in Urbane, which is a dark, neutral grey more on the cool side than the warm side. I love it. It's just the right amount of modern while still being neutral. I do love red walls, but we have quite a few of them in our house -- and it's time for a change. And now that I know how to paint crisp lines on these textured walls, I'm ready to tackle more of the painting.

I hope this painting tip helps you -- no matter what kind of walls you have. Until next time,
Stay crafty!
Lissa :)

Tuesday, June 04, 2013

Entry Makeover

In our new house, we've had to adjust a bit to where we store coats and shoes. We mostly come in through the garage, but since that door is right in the kitchen, there's no space to hang our stuff. So instead, we go through the dining room to the front door, where there's a little alcove and room for shoes and coats. And it's normally a mess...


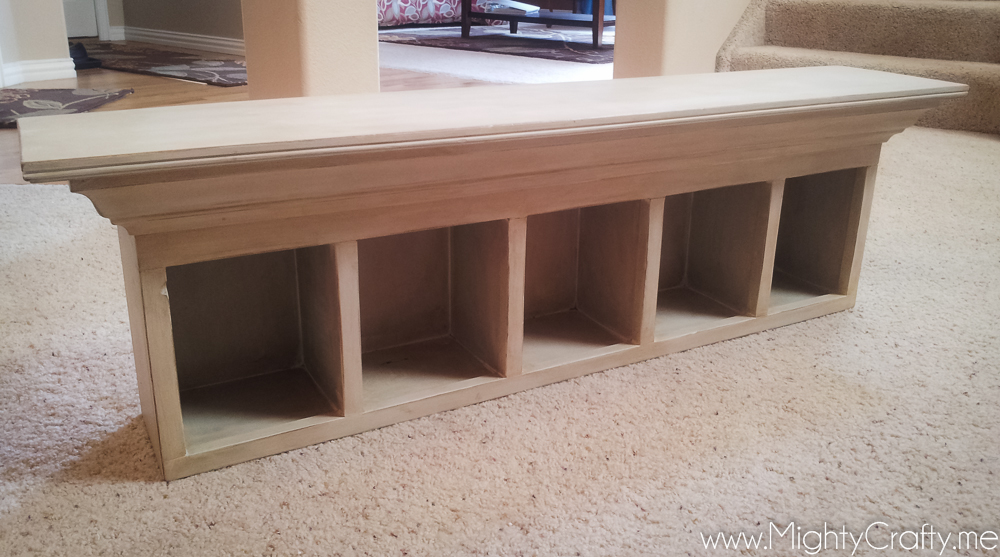
Enter this humble shelf I picked up a garage sale...


I painted it in Duck Egg blue chalk paint and hung it with two sets of hooks from IKEA. Perfect.


I love how it turned out. The entry still gets messy but it's much prettier to look at.

Thursday, June 07, 2012

May 2012 Crafty Round-Up

I've been doing monthly round-ups for 2012, based on the class Kate Nelson taught at Big Picture Classes. I thought it would be fun to do a craft project round-up too, here on this blog. You can see the one I did for our family blog here.

For projects around the house, I made drop-cloth curtains to replace the vertical blinds in the dining room.

MightyCrafty.me - Embellished Drop-Cloth Curtains

Byron put in a new bathroom faucet in the powder room. Love how it completes the room after the makeover it got earlier this year.

MightyCrafty.me - New faucet in the powder room

I painted the front door inside and out. What a difference. Love it even though this paint job made me cry at least 3 times (that's not an exaggeration - I'm terrible at painting).

MightyCrafty.me - Painted front door

MightyCrafty.me - Painted front door

I'm really proud of myself for staining the deck all by myself. When we moved in last year, I knew the deck was going to need to be tackled at some point. It had been neglected for a few years by the look of it, and was pretty sorry and grey. I kind of got a wild hair one day and thought I should just stain it before I chickened out. It was not easy, but I'm super happy it's done. It's now a nice dark brown.

MightyCrafty.me - Staining the deck

And best of all, We had the master bedroom, bathroom, and closet painted. Here's how the bedroom looked when we moved in:

MightyCrafty.me - Ugly bedroom - Before

MightyCrafty.me - Ugly bedroom - Before

Crazy, right? What is up with those black stripes? It's so very-1995, even though this house was built in 2005. And those black stripes are textured with some kind of plaster, so I was kinda thinking it would be impossible to paint over them. And then, we had a very plain white bathroom (don't even get me started on the very weird tub-in-the-floor):

MightyCrafty.me - Ugly bathroom - Before

MightyCrafty.me - Ugly bathroom - Before

 The thought of painting these rooms by myself was daunting to say the least - especially since, as I mentioned before, I have cried at much lesser paint jobs. Instead, we splurged and hired an awesome painter. He was able to paint all three spaces in 2 days. It looks AH-MAZ-ING.

MightyCrafty.me - Gray Bedroom - After
 MightyCrafty.me - Gray Bedroom - After

Bye-bye black stripes...so much better. I am so happy every time I walk into our bedroom now. The bedroom color is Proper Gray from Sherwin-Williams. And the bathroom is Respite, also from Sherwin-Williams.

MightyCrafty.me - Blue Bathroom - After
 MightyCrafty.me - Blue Bathroom - After

So nice and bright and lovely. Both rooms still need lots of sprucing up, but it's so wonderful to have the painting all finished. I keep hoping I'll run into Matt Muenster while I'm shopping at Lowe's some weekend and end up with a bathroom makeover. Sigh.

HGTV - Matt Muenster
Mmmmm....Matt....

That's it for home decor - that's quite a lot for a month, even if 1 of those projects I hired out.

For scrapbooking in May, I created 7 scrapbook layouts this month - 5 paper...
MightyCrafty.me - May 2012 Paper Layouts
 MightyCrafty.me - May 2012 Paper Layouts

 ...and 2 digital...

MightyCrafty.me - May 2012 DigiLayouts
That first layout was from a tutorial at Jessica Sprague's Photoshop Friday. Love those weekly lessons!

And finally, I started playing around with Lightroom print templates and created one to share with you all via download. I hope you enjoy it - and I'm hoping to make more soon.

That's it for May - a busy month. June is already underway, and I know I'll have more projects to share soon.

Tuesday, April 17, 2012

Painted Bench

When I picked up this bench for $5 at a garage sale this past fall, it was not pretty. It had no seat and was covered in this textured flecked-stone spray paint.


But I saw the potential and brought it home anyway. Hubby added a seat, and the boys helped me sand (almost) all that flecked-stone paint off. It was a lot better.


But it wasn't quite finished yet. I painted it a light gray to start.


I then distressed the edges and stained it with a dark espresso stain (my first staining experience). It was lovely and perfect.


The dark stain changed the gray to a deeper, shadowy color that I just love.


The distressed dark edges really show up against the lighter gray.


It now sits on my front porch with the shabby blue chair, looking lovely.


I love how it turned out. My front porch is really coming together. Thanks for looking!

Linking up to these parties:


  :   Home Stories A2Z

Saturday, April 07, 2012

Shabby Blue Chair

I'm so in love with this project. This started out as an old wooden chair I picked up at a garage sale last fall for $5. It was wobbly and dirty and not pretty at all, but I saw the potential. I've seen lots of chair makeovers on Pinterest, and I knew I could make this one adorable.

Here's the original chair - you can see it's a pretty plain little chair under all that Halloween stuff.


It sat on my front porch all winter until the weather was finally warm enough in late March to tackle this project.

To paint the chair, I followed the process outlined in The Everygirl Handbook: Repainting Furniture by Kate Riley and in Creating Your Masterpiece by Shaunna West. Both are incredible resources for convincing me that I could do this. You should definitely pick up those e-books if you want to paint some furniture.

So, to start with, I sanded the chair down a bit, just to clean it up and get the rough spots off. The seat was cracked across the middle and one of the cross-pieces in the legs was out of line. So we filled in the crack with glue (just plain old Elmer's) and used a hammer to gently tap the legs back into place.


Hubby used his clamps to hold the seat together while the glue dried.


Now it was time for the fun part - painting. I picked out a nice robin's egg blue from Home Depot - Blue Feather by Behr. It went on very pastel-ish but dried a bit brighter, just what I was hoping for. I gave it 2 coats of paints. I let it dry overnight between coats.

Then it was time to distress it. I used a little square of sandpaper to knock the paint off the edges in strategic places. Shaunna's ebook really explains this well - and she has a few videos to go along with the written process. Very, very helpful. I had fun with the distressing part - I think it looks just right for what I wanted.


I didn't stain or glaze this chair after distressing. I just loved how it looked with the blue paint and the wood showing through a bit. So I rubbed a wax sealant on top to finish it off and put it out on the porch. When my boys saw the finished chair, Jack sorrowfully told me, "Um, Mom, I'm sorry to tell you that the paint is already coming off." I had to laugh and explain that's how I wanted it to be.


It looks super cute on my porch - it adds just a little touch color for spring. And it makes me happy every time I look at it. :)


Linking up to these parties:

I Heart Nap Time             
Related Posts Plugin for WordPress, Blogger...