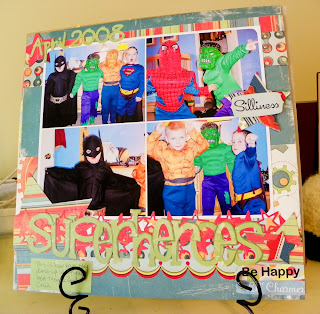
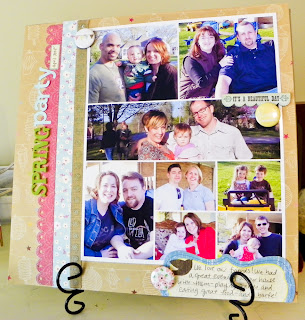
My own take on photo collage layouts - not nearly as fancy as Nichol's but I love them anyway:


I created these photo collages in Photoshop, but I knew it could be done a little quicker in Lightroom - so I started playing around with these and am hooked! Lightroom photo collages are easier because you just create a collection of your edited/cropped photos, then drag-and-drop them into the collage template. Once you get started, it's easy to make a collage to suit your needs.
I learned most of what I know from DigiScrap 101. Kayla Lamoreaux has awesome tutorials on her site about using Lightroom in general - and about using Lightroom to scrapbook and creating print templates too. I recommend starting there to see Kayla's awesome video tutorials - she also teaches an amazing class at JessicaSprague.com for Finding Your Photo Flow which has a ton of Lightroom information too. (And a special thanks to Leslie for pointing me in the right direction...)
So, back to the Lightroom print templates. I found these great Lightroom print templates from HalinaV and they got me started customizing my own templates. So, I've created a photo collage template for you as a free download. I'm just starting out with these, so if you have feedback about if / how it works for you, please let me know. This print template has been tested in Lightroom 3 and Lightroom 4.
To work with the template:
- In Lightroom, go to the Print module.
- Under Template Browser, right-click on User Templates and choose Import.
- Browse to where you saved the template, choose the template, and click Import.
Some tips when working with print templates:
- Edit and - most importantly - crop your photos before you put them in the photo collage. There's not a ton of flexibility to adjust the size of your final photo once you put it in the collage without messing up the whole collage.
- Don't worry about the black line around the photos you see in Lightroom. When you print or export the collage, it's not there.
- Photo Borders:
- You can adjust the width of the borders to suit your needs - just go to Image Settings in the right-side panel and look under Image Settings. Under Photo Border, adjust the slider or type in a size by clicking in the pt box. The color of the border will be the same as your Page Background color.
- If you want to change the color of the border to make it different from your Page Background, uncheck the Photo Border and instead check the Inner Stroke box. You can then click in the color bar and choose a different color. You can even layer these with a Photo Border for a double-matted look.
- If you prefer, you can turn the borders off altogether. Just uncheck the Photo Border and Inner Stroke boxes.
- You might want to change the collage to go landscape instead of portrait, or vice versa. To do so, click Page Setup at the bottom of the left-side panel. Under Orientation, choose Portrait or Landscape, then click OK.
- On the right-side panel under Print Job, choose Print to. You can choose Printer or JPEG File. Each gives you different options.
- If you choose Print to: Printer, you can set your Print Resolution, Print Sharpening, and Media Type. For my settings:
- Print Resolution: 300 ppi
- Print Sharpening: Standard
- Media Type: Glossy or Matte depending on the paper I'm using.
- Then click Print and set up your print settings for your printer as you would if you were printing a photo.
- If you choose Print to: JPEG file, you can still set your Print Resolution and Print Sharpening.
- You can also set your JPEG Quality and Custom File Dimensions.
- The Custom File Dimensions allows you to set a larger canvas size, which is great if you're a digi-scrapper and creating a digital layout to work with in Photoshop.
- To print, choose Print to File and choose a location to save your exported JPG. You can then print the photo collage or work with it in Photoshop to add text, paper, or embellishments.


This looks great! Thanks. I'll let you know when I've got something created.
ReplyDeleteThanks Karen! I would love to see it.
ReplyDeleteVery nice! I don't use Lightroom myself but thanks for sharing :) Over from the Simple Scrapper Premium Membership Facebook Group.
ReplyDeleteThanks for visiting Katie!
ReplyDelete