I have quite a stash of Studio Calico kits. Their kits are always great, and Studio Calico's Front Row kit (Feb. 2013) was no exception. I went back to this kit recently to clean out my kit stash a bit and make room for new ones. I had used the kit already, so I had just enough left to create a few last layouts before calling it done.
This first layout is based on a layout by Amanda Jones in the Silhouette 101 class at My Creative Passion. The circles here are a cut file from that class. I backed the circle with various patterned paper from the kit and foam-dotted the circles and the photos up off the background.
The stitching around the edge gives this simple layout a nice frame.
I added just a few simple embellishments to finish off the page -- along with a few little stamps from the Front Row kit.
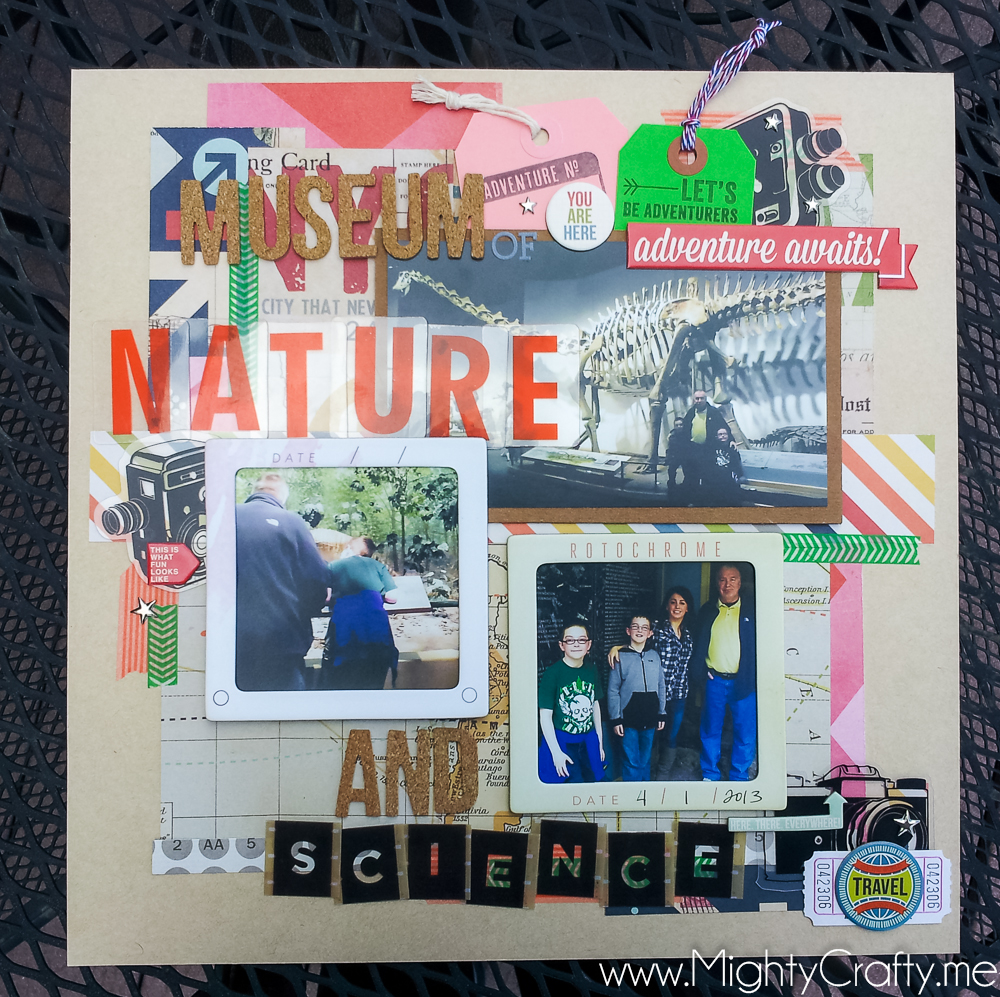
Next, I was inspired by a video at Two Peas by Jill Sprott to use lots of frames on a layout. I had a bunch of frames sitting on my table from working with Studio Calico's Roundabout kit, so I used those along with the Front Row kit to make this layout.
The photos are straight out of my category drawers -- a photo organization method taught by Stacy Julian as a place to store your extra photos, the ones left over after you make a page. Those photos are organized by categories (as the name implies), so I was quickly able to find photos of each of us and all of us together.
I'm addicted to stitching lately. I sewed another frame on this page. Love how it looks.
With these two layouts, I officially finished off my Front Row kit from Studio Calico, making room for more kits to come. :)
Saturday, July 27, 2013
Thursday, July 25, 2013
Quick and Easy
Quick and easy is a good thing when you don't have a lot of time to scrapbook. However, quick and easy doesn't mean boring. When you're pressed for time, you can put a page together quickly by concentrating on a few elements that make your page feel special -- not rushed.
On this first layout, I had a kit from Polka Dot Whimsy that included lots of ribbon and fabric strips. I hadn't yet used them on a layout, so I decided to go all out and use them all on a single page. I just stitched each ribbon or fabric piece down on cardstock, matted my photo and added a few simple embellishments.
Love that fabric flower -- it was a premade element in the kit.
Quick and easy -- but definitely not boring.
Next, I created this layout very quickly with a collection kit from Echo Park. I simply used strips of paper for the background, a large focal photo, and sticker embellishments from the kit.
The kit included some cute star stickers, so I created a few more with my paper punches.
Again, quick and easy, but also fun and heart-felt.
When you don't have a lot of time to scrapbook, you can still create great pages quickly. Just concentrate on putting a few special elements together to get a look you love.
On this first layout, I had a kit from Polka Dot Whimsy that included lots of ribbon and fabric strips. I hadn't yet used them on a layout, so I decided to go all out and use them all on a single page. I just stitched each ribbon or fabric piece down on cardstock, matted my photo and added a few simple embellishments.
Love that fabric flower -- it was a premade element in the kit.
Quick and easy -- but definitely not boring.
Next, I created this layout very quickly with a collection kit from Echo Park. I simply used strips of paper for the background, a large focal photo, and sticker embellishments from the kit.
The kit included some cute star stickers, so I created a few more with my paper punches.
Again, quick and easy, but also fun and heart-felt.
When you don't have a lot of time to scrapbook, you can still create great pages quickly. Just concentrate on putting a few special elements together to get a look you love.
Tuesday, July 23, 2013
Using Up Your Button Stash
I have a huge collection of buttons. Remember about 2004 when buttons were just the rage for scrapbook pages? I still love how buttons look on my pages -- but I have to make myself dig out my button stash and use them up every now and then.
I just finished taking Shannon Tidwell's Sassy Scrapbooking workshop at Two Peas. Loved it. I have always loved Shannon's style -- she's been a Garden Girl there forever -- and in this workshop, she shared so many ideas that can really push your scrapbook layouts out into that fun and sassy style she is known for.
In one of the chapters of Shannon's class, she shared a layout where she created a huge star across her page with pom poms. I was inspired by that layout to create this first layout by creating a small heart from buttons right on the photo.
Not quite as large and amazing as Shannon's layout, but I love the soft, sweet look of the buttons.
So on this next layout, I really went all out to create something large and amazing...it might be one of my most favorite layouts ever.
The papers and stamps are from the Studio Calico Front Row kit (Feb. 2013). Love those stamps! It's a set that says "This is how our story begins" and "Let's go on an adventure" plus two arrows, all in a handrawn font - perfect for adding just a little something to your layout. The heart stamp is from the class kit from Studio Calico's Pop Off the Page class (I think?).
And then those washi flags - love them. Shannon shows how to make these in her class too. I added some drops of mists and also stitched around the border of the page twice, something Shannon talks about in her class. I don't get out my sewing machine often enough, so this was a great reminder at how easy and awesome it looks.
I love this layout so much. I love the photos -- one from when hubby and I were dating and one from earlier this year -- and I love the big, bold heart.
Finally, I was inspired by another layout idea in Shannon's class -- she cut up apart a sheet of tickets and cards to create a border across the top of the page. So, I created this layout using the same cut-apart idea plus a border of buttons across the bottom to balance it out. Since the buttons were already out, I figured I should just keep using them...
These photos are of my hubby just before entering his senior year. Our boys thought these photos were hilarious. ("Why do they have him leaning on a column like that?! It looks so fake!") They just don't understand trends and style yet. LOL.
The cards and tickets across the top are an easy and fun way to use those 12x12 cut-apart sheets. I will have to do this again.
And I do love the buttons across the bottom...
Thank you, Shannon, for such a great class. I have even more ideas and inspiration ready to go for future layouts. If you haven't taken Shannon's class yet, you should definitely do it. I loved it!
I just finished taking Shannon Tidwell's Sassy Scrapbooking workshop at Two Peas. Loved it. I have always loved Shannon's style -- she's been a Garden Girl there forever -- and in this workshop, she shared so many ideas that can really push your scrapbook layouts out into that fun and sassy style she is known for.
In one of the chapters of Shannon's class, she shared a layout where she created a huge star across her page with pom poms. I was inspired by that layout to create this first layout by creating a small heart from buttons right on the photo.
Not quite as large and amazing as Shannon's layout, but I love the soft, sweet look of the buttons.
So on this next layout, I really went all out to create something large and amazing...it might be one of my most favorite layouts ever.
The papers and stamps are from the Studio Calico Front Row kit (Feb. 2013). Love those stamps! It's a set that says "This is how our story begins" and "Let's go on an adventure" plus two arrows, all in a handrawn font - perfect for adding just a little something to your layout. The heart stamp is from the class kit from Studio Calico's Pop Off the Page class (I think?).
And then those washi flags - love them. Shannon shows how to make these in her class too. I added some drops of mists and also stitched around the border of the page twice, something Shannon talks about in her class. I don't get out my sewing machine often enough, so this was a great reminder at how easy and awesome it looks.
I love this layout so much. I love the photos -- one from when hubby and I were dating and one from earlier this year -- and I love the big, bold heart.
Finally, I was inspired by another layout idea in Shannon's class -- she cut up apart a sheet of tickets and cards to create a border across the top of the page. So, I created this layout using the same cut-apart idea plus a border of buttons across the bottom to balance it out. Since the buttons were already out, I figured I should just keep using them...
These photos are of my hubby just before entering his senior year. Our boys thought these photos were hilarious. ("Why do they have him leaning on a column like that?! It looks so fake!") They just don't understand trends and style yet. LOL.
The cards and tickets across the top are an easy and fun way to use those 12x12 cut-apart sheets. I will have to do this again.
And I do love the buttons across the bottom...
Thank you, Shannon, for such a great class. I have even more ideas and inspiration ready to go for future layouts. If you haven't taken Shannon's class yet, you should definitely do it. I loved it!
Sunday, July 21, 2013
Studio Calico June 2013 Layouts
I really loved the Studio Calico kit for June 2013 -- Roundabout. I already shared the Project Life layouts I created with the kit. Today, I'm sharing the 12x12 layouts I created with the main kit and one of the add-ons.
This first layout is based on a layout video Jen Gallacher posted a few weeks ago. I loved her layout and wanted to recreate a version of it with the Roundabout kit.
I love how colorful everything ended up being. I had some trouble figuring how to adhere those letters since they're transparent, but staples worked great and added some nice texture.
Next up, another layout based on that same video by Jen Gallacher. I loved it so much, I had to do it again...
On this version, I add more photos. It worked great, while still keeping the sketch of the layout intact.
Next, I created a layout inspired a different Jen Gallacher video. I love the page divided in half with all the file folders at the bottom. I cut the folders with my Silhouette.
A first for me (or at least it's been many years) -- I printed my journaling in a fun typewriter font. Jen does this a lot in her videos and I love the look. I will be doing this again soon.
I created the title with my Silhouette too. For the "Destination" part, I added an arrow through the middle to hold all the letters together. I think I saw that idea on a video by Nichol Magouirk. A great way to use any font without having to weld the letters together completely.
The kit included this awesome summer chalkboard paper (I think it's from Pebbles?). It was too beautiful to cut up, so I built up a mat with paper scraps to showcase just one great photo.
Love the bright colors against the black and white...
The frame stamp and the July font stamp were from the Roundabout kit too. Love both of those...if you look closely, you will see that Adventure frame in three out of the four layouts here. I was pretty proud of myself for stamping so much this month.
And one more layout before I called this kit done. This layout was a fun mash-up of the various papers and elements in the kit. Those black camera are transparent and when I first got them in the kit, I wasn't a big fan. But I love them on this layout.
That's it for the Roundabout kit from Studio Calico. Such a great month from them. I loved the brighter colors and summery travel elements.
What have you been creating? Link it up in the comments, and I will check it out. Thanks!
This first layout is based on a layout video Jen Gallacher posted a few weeks ago. I loved her layout and wanted to recreate a version of it with the Roundabout kit.
I love how colorful everything ended up being. I had some trouble figuring how to adhere those letters since they're transparent, but staples worked great and added some nice texture.
Next up, another layout based on that same video by Jen Gallacher. I loved it so much, I had to do it again...
On this version, I add more photos. It worked great, while still keeping the sketch of the layout intact.
Next, I created a layout inspired a different Jen Gallacher video. I love the page divided in half with all the file folders at the bottom. I cut the folders with my Silhouette.
A first for me (or at least it's been many years) -- I printed my journaling in a fun typewriter font. Jen does this a lot in her videos and I love the look. I will be doing this again soon.
I created the title with my Silhouette too. For the "Destination" part, I added an arrow through the middle to hold all the letters together. I think I saw that idea on a video by Nichol Magouirk. A great way to use any font without having to weld the letters together completely.
The kit included this awesome summer chalkboard paper (I think it's from Pebbles?). It was too beautiful to cut up, so I built up a mat with paper scraps to showcase just one great photo.
Love the bright colors against the black and white...
The frame stamp and the July font stamp were from the Roundabout kit too. Love both of those...if you look closely, you will see that Adventure frame in three out of the four layouts here. I was pretty proud of myself for stamping so much this month.
And one more layout before I called this kit done. This layout was a fun mash-up of the various papers and elements in the kit. Those black camera are transparent and when I first got them in the kit, I wasn't a big fan. But I love them on this layout.
That's it for the Roundabout kit from Studio Calico. Such a great month from them. I loved the brighter colors and summery travel elements.
What have you been creating? Link it up in the comments, and I will check it out. Thanks!
Friday, July 19, 2013
Then & Now
I love creating layouts that showcase photos from different times in our family's life. This is something I never did much before taking Stacy Julian's class at BPC -- Finding Photo Freedom. I just finished up an alumni version of the workshop this past spring, and it was a great way to refresh my photo systems and add in a few new tools. I highly recommend this class -- it has changed my photo organization and scrapbooking life completely.
So in this layout, I featured two photos from the same spot at Legoland California. The first photo is from 2007 and the second is from 2012. When we returned to Legoland last year and saw that lion, we knew we had to get another photo of the boys. I love those little faces peeking out...
Most everything is from a Boys Rule kit from last year -- the papers are in the Basic Grey Clippings collection. Love them - very neutral and go with anything. I used my Kiwi Lane designer templates to lay out the papers in a central stripe down the middle.
The camera die cut was included in the Boys Rule kit, along with the elements and stickers. I created the title with my Silhouette, adding an offset as a mat (love that feature).
Love this layout! It is so fun to see photos from two different times on a single page.
I challenge you to create a layout using photos from two or more time periods. You will love the results...
So in this layout, I featured two photos from the same spot at Legoland California. The first photo is from 2007 and the second is from 2012. When we returned to Legoland last year and saw that lion, we knew we had to get another photo of the boys. I love those little faces peeking out...
Most everything is from a Boys Rule kit from last year -- the papers are in the Basic Grey Clippings collection. Love them - very neutral and go with anything. I used my Kiwi Lane designer templates to lay out the papers in a central stripe down the middle.
The camera die cut was included in the Boys Rule kit, along with the elements and stickers. I created the title with my Silhouette, adding an offset as a mat (love that feature).
Love this layout! It is so fun to see photos from two different times on a single page.
I challenge you to create a layout using photos from two or more time periods. You will love the results...
Wednesday, July 17, 2013
Halloween in July
I admit it -- I love Halloween. I have done many blog posts about my Halloween projects around the house, but it's been a long time since I've done any Halloween scrapbooking. I keep up with our yearly Halloween celebrations in an 8x8 album where I do a single spread for each year. But I also have a big 12x12 album devoted just to Halloween layouts -- my favorite kind of layouts.
When it comes to holidays, I admit it -- I'm a theme-loving kind of girl. I used these Halloween papers from a DCWV glitter stack and lots of Halloween shapes cut with my Silhouette Cameo designed by Kerri Bradford. And of course, I used my Kiwi Lane designer templates -- the best tool for showing off all those beautiful papers.
Hubby and I were dead rock stars in 2009, while the boys were the more tame Woody and Buzz. My mom was dressed as a witch. It was a fun holiday, with a big Halloween party at our dear neighbors' house in KC (miss you guys!).
I so love all those Halloween shapes. Super easy to cut the Cameo -- and they add so much impact.
I challenge you to do a Halloween layout in the middle of summer. I know you will love the results...
When it comes to holidays, I admit it -- I'm a theme-loving kind of girl. I used these Halloween papers from a DCWV glitter stack and lots of Halloween shapes cut with my Silhouette Cameo designed by Kerri Bradford. And of course, I used my Kiwi Lane designer templates -- the best tool for showing off all those beautiful papers.
Hubby and I were dead rock stars in 2009, while the boys were the more tame Woody and Buzz. My mom was dressed as a witch. It was a fun holiday, with a big Halloween party at our dear neighbors' house in KC (miss you guys!).
I so love all those Halloween shapes. Super easy to cut the Cameo -- and they add so much impact.
I challenge you to do a Halloween layout in the middle of summer. I know you will love the results...
Monday, July 15, 2013
Project Life with Studio Calico's Roundabout Kit
I really loved Studio Calico's Roundabout kit from June 2013. I got the main kit and purchased one of the add-ons, plus the Project Life kit and the add-on for that as well. Once I get my kits, I put all of the materials together in a large 14x14 box that sits open on my scrapbook table. That way, I can create with it all month as I'm working on new projects.
Today I want to share the Project Life layouts I created with the Roundabout kit. I loved the colors and elements for this month. I added a few things from my stash as well.
Here's my first layout for April - just two PL layouts total for April. I'm not stressing about being "behind" or getting caught up. I know I will get there by the end of the year...
Here I added washi tape, labels, and the camera clip (Prima). I really love putting a full 4x6 photo across two 4x3 pockets.
On this layout, I added in a 4x6 card from the Studio Calico Darling Dear collection, as well as the washi tape and labels. Love that "Let's Be Adventurers" stamp in the Roundabout kit. I used it a lot this month. And the alpha stamp from Roundabout was perfect for stamping out "Minecraft" (Anyone else have minecraft-crazy boys in their house?)
The cork Thickers in the Roundabout kit are awesome. I'm hoping they'll be available in stores at some point. When using bulky items like Thickers and brads, I put them on the outside of the pocket.
Next up, my second layout for April. Brighter colors this time...
Pinks and oranges aren't the most usual colors for boys, but I like how it looks here. I added in washi tape, labels, and flair from my stash.
Love those wood veneer 4x3 cards...
I used the Roundabout frame stamp to create a custom-size slide frame for our new shoes. I just stamped the image, colored it in with markers (so fun to color again!) and then cut the edges apart, removing just enough to frame my photo. I added asterisk stickers over top of the seam to hide it a bit.
I'm looking forward to more Project Life layouts for May, coming soon...
Today I want to share the Project Life layouts I created with the Roundabout kit. I loved the colors and elements for this month. I added a few things from my stash as well.
Here's my first layout for April - just two PL layouts total for April. I'm not stressing about being "behind" or getting caught up. I know I will get there by the end of the year...
Here I added washi tape, labels, and the camera clip (Prima). I really love putting a full 4x6 photo across two 4x3 pockets.
On this layout, I added in a 4x6 card from the Studio Calico Darling Dear collection, as well as the washi tape and labels. Love that "Let's Be Adventurers" stamp in the Roundabout kit. I used it a lot this month. And the alpha stamp from Roundabout was perfect for stamping out "Minecraft" (Anyone else have minecraft-crazy boys in their house?)
The cork Thickers in the Roundabout kit are awesome. I'm hoping they'll be available in stores at some point. When using bulky items like Thickers and brads, I put them on the outside of the pocket.
Next up, my second layout for April. Brighter colors this time...
Pinks and oranges aren't the most usual colors for boys, but I like how it looks here. I added in washi tape, labels, and flair from my stash.
Love those wood veneer 4x3 cards...
I used the Roundabout frame stamp to create a custom-size slide frame for our new shoes. I just stamped the image, colored it in with markers (so fun to color again!) and then cut the edges apart, removing just enough to frame my photo. I added asterisk stickers over top of the seam to hide it a bit.
I'm looking forward to more Project Life layouts for May, coming soon...
Subscribe to:
Posts (Atom)


