Sunday, July 15, 2012

MightyCrafty Mondays - Round 3

It's time for the third round of MightyCrafty Mondays...

MightyCrafty Mondays Pin-Up Party at www.MightyCrafty.me

Here are the Pin-up Party rules:
  1. Share your crafty project in the linky list below. Anything goes! Recipes, home decor, scrapbooking, cards, knitting - anything you've made with your own 2 hands and want to share with us.
    • Link directly to your original post - not the homepage of your blog.
    • You *must* be the creator/owner of the project you're linking up.
    • Don't link up to a store or a giveaway.
    • Don't link up to a post that's just a collection of photos from Pinterest or Google. 
  2. Link back to this blog in your original post. Grab the link party graphic below. (I'd also love it if you'd leave me a comment here too...)
  3. Visit the projects in the linky list and pin them to your Pinterest boards. (You can also leave some comment love if you have time.)

MightyCrafty Mondays Pin-Up Party at www.MightyCrafty.me
<a href="http://mightycrafty.blogspot.com/" target="_blank"><img src="https://blogger.googleusercontent.com/img/b/R29vZ2xl/AVvXsEj0nfNouaZALh3m7t9sa5obJXKmhguwNMMnjTGT5jccb0EzvtfH4ajjO_EArVR25SkA4jD0RUzAhW36A5W_snfOr5hfk4ElrMN7KCf4TlrMmtdU7RlkVKFpQL8tW1YYWwF7NWg5/s1600/MightyCraftyMondaysButton.jpg" alt="MightyCrafty.me" width="125" height="125" /></a>


I'll be visiting / pinning / commenting on all the blogs who participate - and featuring the top views too. This is a fun way to share what we're working on and get lots of new ideas. I love to see all the creativity going on. Have fun and pin on!

Thursday, July 12, 2012

Boys Rule Sketch Layout

So I'm just now posting this layout based on this second great sketch at the Boys Rule blog for June 2012. I again used the June 2012 kit from Boys Rule. Love these colors...

June 2012 Sketch Layout with Boys Rule kit - MightyCrafty.me


I used a dark blue mist on the background with a little piece of multi-circle chipboard from my boys' latest Pokemon purchase as a mask. I then used the blue Distress Stickles from the kit to accent the circles. I misted the wood frame and added glitter too.

June 2012 Sketch Layout with Boys Rule kit - MightyCrafty.me

Love those rosettes as accents - even if I'm the worst at making them and end up cursing a lot.

June 2012 Sketch Layout with Boys Rule kit - MightyCrafty.me

Once I was done with this layout - and since I had already done another sketch layout with this kit - I had just a few things left in the kit...


So I challenged myself to use up the rest of the kit - and created this layout, based on a collage layout by Nichol Magouirk.

3-Photo Collage Layout with Boys Rule June 2012 kit - MightyCrafty.me


Again, love the happy colors and those rosettes!

3-Photo Collage Layout with Boys Rule June 2012 kit - MightyCrafty.me


Thanks Nichol for the inspiration - I love her layouts so much. And thank you Boys Rule scrapbooking kits for the awesome kit. I've used up almost everything in this month's collection. Can't wait to get started with July's kit...

Monday, July 09, 2012

Featured Posts from MightyCrafty Mondays Round 1

It was so fun to host my first link party last Monday and to see everyone's contributions. This week's link party is still going on, so be sure to link up your latest projects.

Now for the featured posts from last week...

First up, we had amazing DIY t-shirt screen printing for a super cute Army party from One Thrifty Chick.


Next, we had Joy's preview post on What To To With Old Fencing? I can't wait for the full reveal.


And finally, we saw the super cute 2x4 Wood Flag just in time for the 4th of July from I Gotta Try That. (Loved her gorgeous 4th of July cake too.)


Thank you ladies for posting your amazing projects. I can't wait to see what you have in store this week. If you were featured, feel free to grab the badge below and post it on your blog.

I was featured at MightyCrafty Mondays at www.MightyCrafty.me
<a href="http://mightycrafty.blogspot.com/" target="_blank"><img src="https://blogger.googleusercontent.com/img/b/R29vZ2xl/AVvXsEjdZssJHJ9UGPiMkAmASJkryhsar2l27PG2-PkiTLSQd4sDqGzNOeTyfrdrXbgdY5PbsLafzmnhLSWoYXi8dkWjtoCDAv1i8syswTJ-JMwxvbuWfFcsoB9NGKcXb7djMaIddUjl/s1600/MightyCraftyMondaysFeatured.jpg" alt="I was featured at MightyCrafty Mondays at MightyCrafty.me" width="175" height="175" /></a>


Sunday, July 08, 2012

MightyCrafty Mondays - Round 2

It's time for a second round of MightyCrafty Mondays. It was so fun to see all the projects linked up last week. I had fun pinning the new ideas to my Pinterest boards. What did you all think?

MightyCrafty Mondays Pin-Up Party at www.MightyCrafty.me

So let's do it again this week. Here are the Pin-up Party rules:
  1. Share your crafty project in the linky list below. Anything goes! Recipes, home decor, scrapbooking, cards, knitting - anything you've made with your own 2 hands and want to share with us.
    • Link directly to your original post - not the homepage of your blog.
    • You *must* be the creator/owner of the project you're linking up.
    • Don't link up to a store or a giveaway.
    • Don't link up to a post that's just a collection of photos from Pinterest or Google. 
  2. Link back to this blog in your original post. Grab the link party graphic below.
  3. Visit the projects in the linky list and pin the ones you love to your Pinterest boards. (You can also leave some comment love if you have time.)

MightyCrafty Mondays Pin-Up Party at www.MightyCrafty.me
<a href="http://mightycrafty.blogspot.com/" target="_blank"><img src="https://blogger.googleusercontent.com/img/b/R29vZ2xl/AVvXsEj0nfNouaZALh3m7t9sa5obJXKmhguwNMMnjTGT5jccb0EzvtfH4ajjO_EArVR25SkA4jD0RUzAhW36A5W_snfOr5hfk4ElrMN7KCf4TlrMmtdU7RlkVKFpQL8tW1YYWwF7NWg5/s1600/MightyCraftyMondaysButton.jpg" alt="MightyCrafty.me" width="125" height="125" /></a>


I'll be visiting / pinning / commenting on all the blogs who participate - and featuring the top views too. This is a fun way to share what we're working on and get lots of new ideas. I love to see all the creativity going on. Have fun and pin on!

Friday, July 06, 2012

A Few Lightroom Tips

It's no secret that I love Lightroom. Organizing my photos in Lightroom has literally changed my life - and I have to thank Kayla and her wonderful Finding Your Photo Flow class for turning me into a Lightroom convert. Thank you Kayla!

Lightroom Tips - www.MightyCrafty.me

I'm getting pretty good and fast at using Lightroom on a daily basis to organize, edit, and print my photos. Each time I work with the program, I learn a little something extra to speed up my workflow.

One of the best tips I learned was from Kayla - it's a little feature called Auto-Advance. It's the way to make your workflow speed up to lightning-fast. Seriously.

As you go through purging and rating your photos, this setting will automatically advance you to the next photo. Sounds like a little thing, but it makes all the difference in the world as you're using those hotkeys to move through your photos. Kayla explains it all here and if you use Lightroom, you need to turn on this feature right now. You can thank me later.

Another thing making me very happy with Lightroom is the print template feature. I love creating and printing my own photo collages. To me, it's so much faster than working with clipping templates in Photoshop - and I end up with a single print with lots of photos that I printed at home. Plus all the settings for editing and printing are right there to adjust, which (in my mind) seems easier than the way you have to do it in Photoshop.

The one frustration I was having was adjusting the crop of my photos just right before placing it in the print template. I was never quite sure how to crop it before I went over to the Print panel, and then was frustrated when it didn't look quite like I wanted it to. So I'd re-crop my photo, then re-insert it into the print template. It was a cycle that quickly got old.

Tips for Lightroom Print Templates - www.MightyCrafty.me
I need to adjust the crop on that middle photo..
I finally had an ah-ha moment when I realized Lightroom automatically re-loads your re-adjusted photo for you. (I'll insert a "Duh" here for myself.)

So you can re-crop your photo after you place it in your print template by going back to the Develop panel and adjusting the crop.
Tips for Lightroom Print Templates - www.MightyCrafty.me
Adjusting the crop in the Develop panel
And voila... when you go back to the Print panel, your photo will be re-loaded with the new crop.

Tips for Lightroom Print Templates - www.MightyCrafty.me
Lightroom has re-loaded the photo with the new crop
Love that I finally noticed this. (Don't love how long it took me to see it.) It's super helpful when you aren't sure what size you're going to want to print the photo until you see how it looks in your print template.

So, all in all, Lightroom is the best. I'm still working in Lightroom 3, which is fine for me - but I'm hoping to upgrade to version 4 soon. I hear it has a lot more features in the Print module, which sounds exciting to me.

Do you have a Lightroom tip to share? I'd love to hear it...

Wednesday, July 04, 2012

4x6 Photo Love Sketch Layout

Happy 4th of July! We are having a laid back day today, after shooting off most of our fireworks last night. So I'm taking a few minutes to do a quick layout share...

I'm a huge fan of Shimelle Laine at Shimelle.com. She's an incredible scrapbooking artist and Two Peas Garden Girl. She shares so much at her website each day, and I love to see her videos and tutorials.

One of the classes she led last year at Two Peas was 4x6 Photo Love. Each month, she shared a sketch featuring a 4x6 photo - and the number of photos corresponded to the number of the month. So, for November, it was 11 photos on a single layout. Pretty impressive. I loved the November sketch, and it was perfect for a stack of photos I had been wanting to scrap.

Parkville Days Parade layout - www.MightyCrafty.me
Yep, that's a little 3-photo sleeve in the middle.
Parkville Days Parade layout - www.MightyCrafty.me
And here's the back of that little photo sleeve...
I so love this design - genius from Shimelle. Using the 3-photo sleeve in the middle is the perfect way to add up to 6 more photos to a layout. I'm going to be using this technique again, I'm sure.

Parkville Days Parade layout - www.MightyCrafty.me
And here's how it looks without the extra sleeve...
Shimelle does a video to go with each sketch to show how she puts her layout together. I love that she shows you how to create great embellishment collages and gives you more ideas for how to finish off your layout together. She's the best...

Parkville Days Parade layout - www.MightyCrafty.me
Not sure how I didn't notice that Happy tag was off-kilter when I was taking this photo...oh well.
Parkville Days Parade layout - www.MightyCrafty.me


Thank you Shimelle for giving me the inspiration to get this layout put together...

Tuesday, July 03, 2012

June 2012 Crafty Round-Up

For 2012, I'm doing monthly round-ups for 2012, based on the class Katie Nelson taught at Big Picture Classes. So what did I create / complete in June?

I did a bit of decorating for summer - an updated mantel and some refreshes around the house.

Summer Mantel by MightyCrafty.me

Summer Decorating - www.MightyCrafty.me

Summer Decorating - www.MightyCrafty.me

I made several scrapbook layouts...

Boys Rule kit club May 2012 sketch layout - www.MightyCrafty.me
Mighty Crafty - Layout using May 2012 Boys Rule Scrapbooking Kit
June 2012 sketch layout for Boys Rule Scrapbook Kit - MightyCrafty.me
Layout from paper scraps - www.MightyCrafty.me

And a few digital layouts too.

Spring Social quick page freebie and Woody alpha by Digital Design Essentials, custom handwriting font by Kristen Creech at jessicasprague.com
Shabby Princess - Sandbox Collection kit, template from Papercropz: Vol 8 by NeeNee Designs, font is my custom handwriting font by Kristen Creech at JessicaSprague.com
Ten Pin kit by Peppermint Creative, template by Anna Aspnes
I started working on a new project (thanks for helping, Mom!)

Project sneak peak - www.MightyCrafty.me

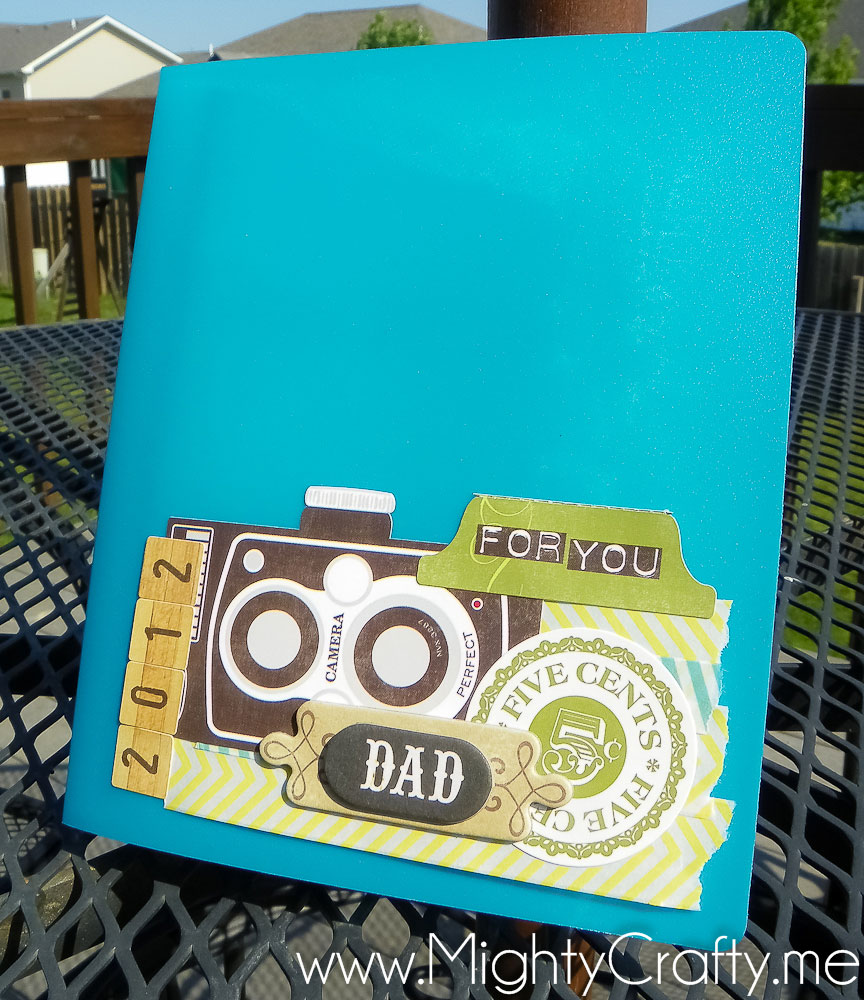
The boys and I made a Father's Day album using this awesome printable from eighteen25. I printed the pages off at home and then used a 4x6 photo album to hold the pages after the boys filled them out. I filled in the rest of the pages with photos of Dad and the boys together.
Father's Day gift album - www.MightyCrafty.me
Father's Day gift album - www.MightyCrafty.me Father's Day gift album - www.MightyCrafty.me
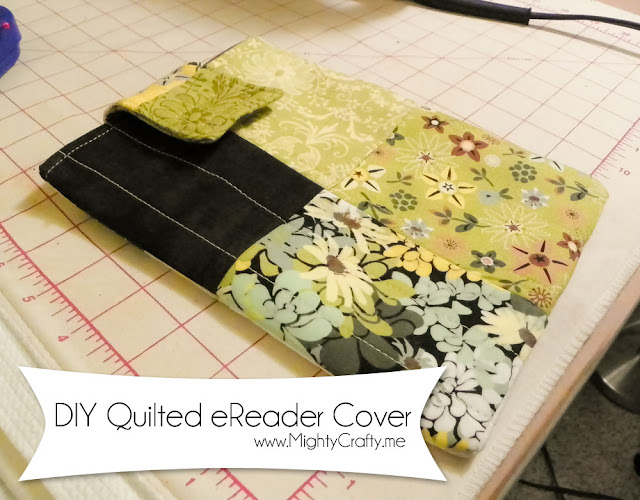
And finally, I sewed an eReader cover for my Kobo.

DIY Quilted eReader Cover - www.MightyCrafty.me

What a great month! I know July will bring more fun. Don't forget - if you haven't linked up to this week's Pin-Up Party, there's still time to do that. I would love to see what you've been working on too...

Sunday, July 01, 2012

MightyCrafty Mondays

I'm announcing a new endeavor here at my blog - MightyCrafty Mondays. I love sharing projects with my cyber-friends. But as busy as we all are, I find myself on Pinterest more than anything else - always searching for new ideas and inspiration.

To help us all share our projects - but in a quick way - I wanted to host a different kind of link party - a Pinterest-link party. We'll do this on Mondays (hence the name).

MightyCrafty Mondays Pin-Up Party at www.MightyCrafty.me

I've participated in many link parties, but I know it's hard to comment on everyone's blog even when you love the ideas. But it's super easy to pin the idea to Pinterest (which is what I end up doing 98% of the time). So, let's have a link party where the whole goal is to pin new fabulous ideas to your Pinterest boards. I'm super excited...

Here are the Pin-up Party rules:
  1. Share your crafty project in the linky list below. Anything goes! Recipes, home decor, scrapbooking, cards, knitting - anything you've made with your own 2 hands and want to share with us.
    • Link directly to your original post - not the homepage of your blog.
    • You *must* be the creator/owner of the project you're linking up.
    • Don't link up to a store or a giveaway.
    • Don't link up to a post that's just a collection of photos from Pinterest or Google. 
  2. Link back to this blog in your original post. Grab the link party graphic below.
  3. Visit the projects in the linky list and pin the ones you love to your Pinterest boards. (You can also leave some comment love if you have time.)


MightyCrafty Mondays Pin-Up Party at www.MightyCrafty.me
<a href="http://mightycrafty.blogspot.com/" target="_blank"><img src="https://blogger.googleusercontent.com/img/b/R29vZ2xl/AVvXsEj0nfNouaZALh3m7t9sa5obJXKmhguwNMMnjTGT5jccb0EzvtfH4ajjO_EArVR25SkA4jD0RUzAhW36A5W_snfOr5hfk4ElrMN7KCf4TlrMmtdU7RlkVKFpQL8tW1YYWwF7NWg5/s1600/MightyCraftyMondaysButton.jpg" alt="MightyCrafty.me" width="125" height="125" /></a>

A couple of notes:
  • Only participate if you want your photos pinned onto Pinterest. There's a bit (a lot) of controversy right now over pinning photographs to Pinterest. (Read more here...)
  • By participating in this link party, you certify that you have permission to share the photographs on your blog post - so please only link up projects that you've created yourself.
  • To protect your own photos, you should add (at least) your blog name to your photos so you can get credit for your ideas on Pinterest. (Even better - follow these ideas from Making the World Cuter to make sure your photos are pinned in the best possible way.)
I'll be visiting / pinning / commenting on all the blogs who participate - and featuring the top views too. I'm hoping this will be a fun way to share what we're working on and get lots of new ideas. I so love to see all the creativity going on. Have fun!

FYI: If you're new to Pinterest and pinning, Amy Lynn Andrews has a great must-read article: The Ultimate List of Pinterest Tips. And another great article about everything-Pinterest is The Ultimate Guide to Pinterest by Confessions of a Slacker Mom.
Related Posts Plugin for WordPress, Blogger...